When you've exhausted every last vein of stone in your immediate vicinity, or simply grown tired of endless pickaxe swings in dark caves, a game-changing solution emerges: the Advanced & Automated Cobblestone Generator Designs (Redstone). This isn't just about creating a few blocks of cobble; it's about engineering a self-sustaining, efficient factory that churns out building materials, silently transforming your Minecraft base into an industrial powerhouse. Forget manual labor; it's time to put Redstone to work.
At a Glance: Your Automated Cobblestone Blueprint
- Core Principle: Leverage the interaction of water and lava to endlessly create cobblestone (or stone).
- Automation Power: Redstone, pistons, and observers are your best friends for hands-free operation.
- Material Mastery: Beyond buckets, you'll need Redstone dust, sticky pistons, observers, hoppers, and chests.
- Design Spectrum: From simple piston pushers to intricate multi-block arrays and even TNT-powered behemoths.
- Safety First: Lava is unforgiving; always build carefully, with containment and protective gear.
- Efficiency Gains: Automated collection via hoppers is non-negotiable for serious production.
- Stone vs. Cobblestone: Use Silk Touch for stone, Fortune for increased cobblestone drops.
The Magic Behind the Blocks: How Cobblestone is Born
At its heart, any cobblestone generator exploits a fundamental Minecraft mechanic: the reaction between water and lava. When flowing water interacts with a lava source block, something special happens. More precisely:
- Obsidian: If flowing water touches a still lava source, you get obsidian – great for nether portals, not for building blocks.
- Stone: If flowing lava touches a still water source, you get stone. This is often the byproduct of early, uncontrolled designs.
- Cobblestone: The sweet spot. When flowing lava meets flowing water, cobblestone is formed. This is the reaction we want to control for consistent production.
The real trick, especially in advanced designs, is to safely and repeatedly create this interaction point and then efficiently break the newly formed block. Whether you end up with cobblestone or smooth stone from these generators depends entirely on your pickaxe enchantment. A pickaxe enchanted with Silk Touch will yield the actual stone block, while one with Fortune will drop more cobblestone per block broken. The challenge, then, shifts from merely generating a block to doing so on demand, at high speed, and with automated collection.
Gearing Up for Advanced Automation: Essential Materials
Before you embark on your journey to automate your cobblestone supply, gathering the right tools and materials is paramount. Think of this as your engineering checklist:
- The Fundamentals:
- Water Bucket & Lava Bucket: These are non-negotiable; the very essence of your generator. Always carry spares.
- Building Blocks: Cobblestone, stone, dirt, or even planks will work for basic construction and containment. Just remember lava will burn flammable blocks.
- The Redstone Arsenal (Where the "Advanced" comes in):
- Redstone Dust: The wiring that connects your components.
- Redstone Torches: For constant power or inverters.
- Observers: These are critical! They detect block changes (like a new cobblestone block appearing) and emit a Redstone pulse.
- Sticky Pistons: Essential for pushing and pulling blocks, allowing for automated breaking or lava control.
- Regular Pistons: Can push blocks, but won't pull them back. Useful in specific contexts.
- Collection & Storage:
- Hoppers: For automatically collecting generated cobblestone and moving it to storage.
- Chests: Your storage solution for the vast quantities of cobblestone you're about to produce. Double chests are recommended.
- Control & Refinement (Optional but Recommended):
- Levers/Buttons: For manually activating or deactivating your contraption.
- Transparent Blocks (e.g., Glass): Useful for controlling water/lava flow, visibility, and as non-flammable barriers.
- Signs: Can halt water flow without blocking items, useful for collection systems.
- For the Truly Extreme (High-Speed & Ultra-Compact):
- TNT: Used as primed entities (not item blocks) in advanced designs called "TNT dupers" for breaking blocks en masse. This is high-risk, high-reward.
- Etho Hopper Clock: A highly reliable and versatile Redstone clock for precise timing in complex systems.
Safety First, Always: Don't Melt Your Base
Lava is a fantastic resource, but it's also a destructive force. When building anything involving lava, especially advanced Redstone contraptions, vigilance is key.
- Gather Everything First: Running out of a crucial block mid-build around lava is a recipe for disaster.
- Choose Your Site Wisely: Build away from anything flammable (wooden structures, forests) to prevent accidental fires.
- Gear Up: Always wear armor. Even a single touch of lava can be lethal without protection.
- Brighten Your Workspace: Ensure the area is well-lit to prevent hostile mobs from spawning and interfering with your delicate Redstone work.
- Handle Lava with Respect: Always use a bucket to place and retrieve lava. Never stand directly above where you're placing it, and have a containment plan (temporary blocks) ready.
- Water Before Lava: This is critical. Always place your water source first in the generation area. If lava flows into empty space, it will turn into an uncontrolled lava lake. If water is already present, it will immediately interact predictably.
- Backup Your World: For truly complex or experimental Redstone builds, consider saving your world beforehand. If things go spectacularly wrong, you can always revert.
- Stay Focused: A moment of inattention can lead to misplaced blocks, uncontrolled flows, or even losing your valuable items to lava.
Building Your Automated Empire: Design Deep Dives
While a basic two-block generator gets you started, true efficiency comes from letting Redstone do the heavy lifting. Here’s how you can scale up.
For a foundational understanding of the simplest builds, you might want to review how to build a cobblestone generator before diving into these more complex, automated systems.
1. Beyond the Basics: The Improved Single-Block Collection System
This design bridges the gap between manual mining and full automation. It focuses on taking the output of a single-block generator and getting it into a chest without you having to touch it.
The Blueprint:
- Core Generator: Start with the standard 1x1 cobblestone generator. This typically involves a water source flowing one block, and a lava source flowing one block, meeting in the middle to form cobblestone. Ensure the water is one level higher than the lava flow.
- Hopper Integration: Directly beneath where the cobblestone generates, dig down and place a hopper. This hopper should feed into a chest below it. If you need to chain multiple hoppers, ensure they are all pointing into each other, eventually leading to a chest.
- Water Current Optimization (Optional but Recommended): For cobblestone that doesn't fall directly into the hopper (e.g., if you're mining manually), you can create a water current. Place signs or temporary blocks to control water flow, guiding any dropped cobblestone items towards the hopper.
- Piston Break Mechanism: This is where the automation begins.
- Place a sticky piston directly adjacent to the cobblestone generation point, facing the block.
- Place an observer facing the lava source block (or the space where the cobblestone forms). When new cobblestone appears, the observer detects the block change and emits a pulse.
- Connect the observer's output via Redstone dust to the sticky piston. You might need a Redstone repeater to extend the signal or add a slight delay.
- This setup ensures that every time a new cobblestone block generates, the observer detects it, triggers the piston, and the piston pushes (and therefore breaks) the cobblestone.
- Reinforce and Shield: Enclose the entire setup with sturdy blocks to prevent lava spills and protect the Redstone circuitry from accidental damage or mob interference.
Actionable Insights: This design reduces your manual input to simply turning it on and off. The piston handles the breaking, and the hopper handles the collection. Pay close attention to the observer's orientation—it must detect the change at the cobblestone spawn point.
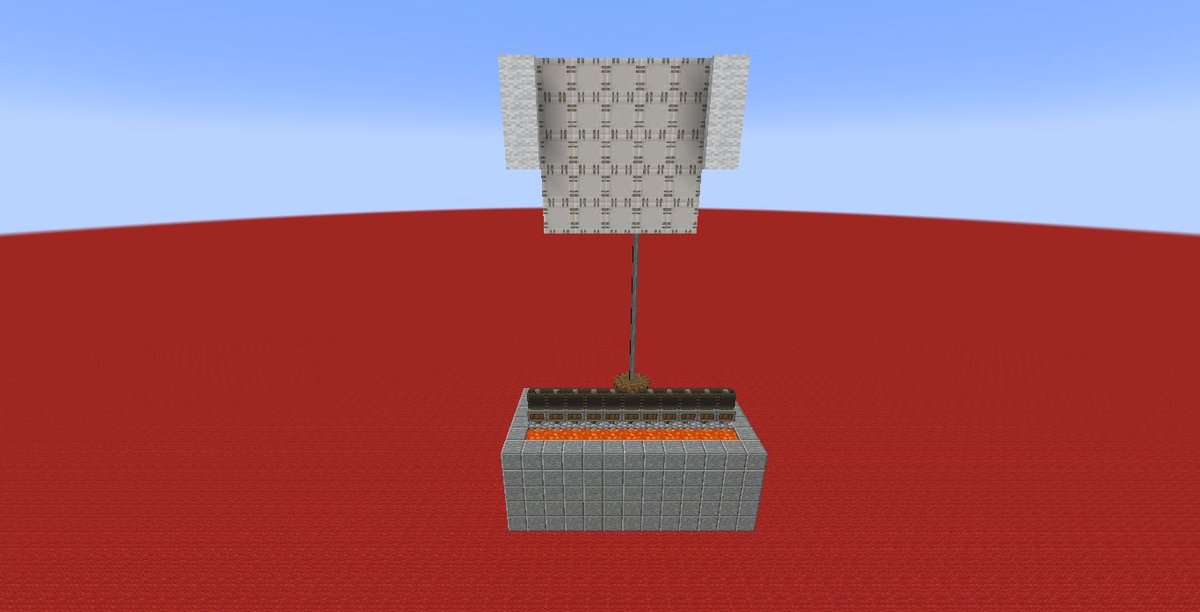
2. The Heart of Automation: Piston-Powered Redstone Generators
This is where Redstone truly shines. These designs are built for continuous, high-volume production with minimal or no player intervention.
The Blueprint:
- Generation Chamber: Construct an enclosed area where the water and lava can flow. Imagine a long trench, typically 1 block wide and several blocks long.
- Water and Lava Flow: At one end, place your water source. At the opposite end, place your lava source. Their flows should meet precisely in the middle to create cobblestone.
- Piston Array: Instead of one piston, you'll often use a row of sticky pistons. These pistons face the cobblestone, ready to push it away. The key is to design it so that once a block is pushed, it's either broken directly or pushed into a collection zone.
- A common variation involves pistons pushing the cobblestone into another block (like a wall), effectively breaking it as it's pushed beyond its boundary.
- Observer-Triggered Logic: Place observers facing the newly formed cobblestone block (or the lava source block that creates it). When the cobblestone forms, the observer detects the change and sends a Redstone pulse.
- Redstone Circuitry:
- Connect the observer's output to a Redstone line that powers your pistons.
- You'll often need Redstone repeaters to ensure the signal reaches all pistons in the row and to add crucial delays. For instance, you want the cobblestone to fully form before the piston fires.
- A simple Redstone clock (e.g., an Etho hopper clock for adjustable speed, or a simple repeater clock) can also be used to periodically fire the pistons if the observer method is too sensitive or you want a fixed timing.
- Collection System: Beneath the path where the pushed/broken cobblestone falls, create a trough lined with hoppers leading into chests. Water currents can help guide items towards the hoppers if the area is large.
- Control Switch: Add a lever or button to turn the entire mechanism on or off. Activating a lever can permanently power a piston or a Redstone line to stop the machine, preventing further cobblestone generation.
Actionable Insights: The beauty of this system lies in its self-sufficiency. Observers detect the creation event, ensuring the pistons only fire when there's a block to break. Shielding your Redstone from water, lava, and mobs is crucial for its longevity. Experiment with repeater delays to find the sweet spot between fast production and reliable operation.
3. Maximizing Space & Speed: Compact & Vertical Designs
When space is at a premium, or you crave even faster output, compact and vertical designs answer the call.
Compact Multi-Block Setup
These designs aim to generate multiple cobblestone blocks simultaneously within a small footprint.
The Blueprint:
- 3x3 Base: Create a 3x3 base structure.
- Water Flow: Place water in one corner of the base, allowing it to flow into the central area.
- Lava Placement: Position lava sources strategically above the water flow. Often, this involves separating the lava from the water with a transparent block (like glass or signs) initially, then removing the barrier to start the flow. The goal is for multiple lava streams to meet water streams, creating multiple cobblestone points.
- Observer Network: Place observer blocks facing each of the cobblestone spawn points or the lava/water sources that trigger them.
- Automated Lava Control (Optional): For very advanced versions, Redstone circuitry connected to observers might activate sticky pistons that periodically push or pull blocks to control the lava flow, allowing for precise bursts of generation.
- Hoppers & Chests: Connect hoppers beneath all cobblestone spawn points, leading them into a centralized chest system.
Actionable Insights: These designs are tricky to build due to the precise flow management required, but yield significant quantities. Be especially cautious of lava spills during construction.
Compact Vertical Generator
This design stacks generation points, creating a column of cobblestone that can be mined from a safe location.
The Blueprint:
- Deep Hole: Dig a 3x3 hole, at least 4 blocks deep.
- Water Layers: Place a water source block on one side of the top layer, allowing it to flow downward.
- Lava Layers: Install lava sources above the water flow, such that the lava flows down into the water, creating cobblestone at each intersection point. This creates multiple layers of cobblestone generation.
- Mining from Below: The beauty here is that you can safely mine the generated cobblestone from below, often placing a hopper-minecart system to collect the drops.
Actionable Insights: This design is relatively simple to set up for multi-block generation, but automation of the breaking process is more challenging for each layer. It's often paired with manual mining or very specific piston-based TNT blast chambers.
Ultra-High Speed: TNT Duping Integration
For the pinnacle of cobblestone production, some players integrate TNT dupers. These Redstone contraptions exploit a glitch to create infinite primed TNT entities without consuming TNT items from your inventory.
How it works (conceptually):
- A TNT duper is built using specific Redstone components (e.g., sticky piston, slime block, fence gate, TNT block).
- When activated by a Redstone signal, it pushes the TNT block in such a way that it becomes a primed entity without being consumed.
- This primed TNT is then directed by water streams or Redstone pulses to explode at your cobblestone generation points, clearing vast quantities of blocks at once.
- The timing of the TNT explosion with the cobblestone generation is crucial, often managed by an Etho hopper clock (a highly reliable and adjustable Redstone timer).
Caveats: While incredibly efficient, TNT dupers:
- Exploit a glitch, which some players consider outside the spirit of the game.
- Are complex to build and time correctly.
- Can be dangerous to your build if not perfectly contained.
- Require careful management to prevent pistons from pushing beyond their limit, which can delete lava sources. Always include a lever to deactivate the system!
Troubleshooting & Refinement: Keeping Your Flow Smooth
Even the most seasoned Redstone engineers face glitches. Here’s how to keep your automated systems running smoothly.
- Water/Lava Placement is King: Double-check that water flows into lava, and that your water source is often one block above the lava source for the correct cobblestone formation. Always place water before lava to prevent obsidian.
- Clear the Path: Ensure the generator area is free of stray blocks or entities that could disrupt water/lava flow or block item collection.
- Material Matters: Use non-flammable, durable blocks for containment, especially around lava. Glass is excellent for visibility and control.
- Test in Stages: If your complex Redstone doesn't work, break it down. Test individual components (observer, piston, Redstone line) before connecting the entire system.
- Continuous Power: For automated breaking, ensure your pistons receive a consistent or timed Redstone signal. Redstone clocks or observer-based triggers are your friends here.
- Safety Platforms: Build sturdy platforms around your generator to prevent accidental falls into lava.
- Optimized Collection: Hoppers should be directly beneath the generation point. For larger generation areas, use water streams to funnel items efficiently into hoppers.
- Secure Your Investment: Enclose your generator with a roof and walls. This protects against mobs interfering, and in rare cases, prevents items from glitching out of the system.
- Flow Height Fine-Tuning: Sometimes, minor adjustments to the height of your water or lava source blocks (even by one block) can dramatically improve cobblestone generation consistency.
- Regular Maintenance: Periodically inspect your Redstone wiring for damage, check hopper chains for blockages, and confirm water/lava flows are still optimal.
FAQs & Common Pitfalls
Q: Why am I getting obsidian instead of cobblestone?
A: This usually means flowing water is hitting a still lava source block. Ensure your lava is flowing (i.e., not a source block being hit by water directly) and the water is correctly interacting with the side of the flowing lava or where flowing lava and flowing water meet.
Q: My pistons aren't breaking the cobblestone, or they're too slow/fast.
A: Check your Redstone timing. If too slow, shorten repeater delays or add more direct Redstone. If too fast, add repeaters to create a longer delay, ensuring the cobblestone block fully forms before the piston activates. Also, ensure the piston is a sticky piston if it needs to retract blocks.
Q: My hoppers aren't collecting all the items.
A: Ensure hoppers are placed directly beneath every potential drop point. If items are scattered, use water currents to funnel them into a centralized hopper collection area. Check that hoppers are pointing into chests or other hoppers.
Q: Can I use regular pistons instead of sticky pistons?
A: Yes, but with limitations. Regular pistons can push blocks, but they won't pull them back. This means they are suitable for pushing cobblestone into a void or another block to break it, but not for mechanisms that require resetting (like a lava flow control).
Q: Is there a limit to how much cobblestone a generator can make?
A: Technically, no. They provide an infinite supply as long as the water and lava sources are in place and working. The limit is how fast you can generate and collect, which advanced automated designs aim to maximize.
Q: Will hostile mobs break my generator?
A: Most mobs won't directly attack your generator blocks unless they are pushed into them by you. However, creepers can explode and damage blocks, and zombies might break down doors or trapdoors if your setup isn't fully enclosed. It's always best to build in a well-lit, enclosed, and safe area.
Your Next Steps to Cobblestone Mastery
Building an advanced, automated cobblestone generator is a rewarding endeavor that fundamentally changes how you gather resources in Minecraft. It's a testament to your understanding of Redstone, flow mechanics, and efficiency.
Start with an improved single-block collection system to get comfortable with observers and pistons. Then, challenge yourself with a multi-piston array for higher output. If you're feeling adventurous and want to truly push the boundaries of automation, delve into the world of TNT dupers and Etho hopper clocks, understanding their complexities and potential risks.
Remember, every grand build starts with a single block. Take your time, test your designs, and soon you'll have an endless supply of cobblestone, freeing you to focus on your next grand architectural masterpiece or Redstone contraption. Happy building!